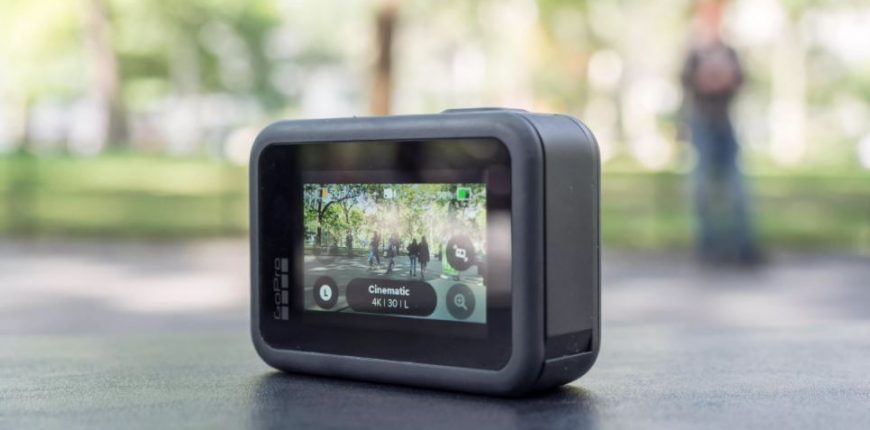
Easily turn your GoPro camera into a webcam for video chats and conferences on Zoom, Microsoft Teams, Google Meet and other platforms. Here’s how.
Many of us are working and socializing from home for the long haul, as coronavirus cases continue to spike nationwide. That means it may be time to upgrade your webcam to make sure you look your best as you virtually meet with coworkers and friends (changing your Zoom background and turning on the beauty filter can only do so much). If you have a GoPro camera, this handy software upgrade will turn it into a webcam compatible with Zoom, Microsoft Teams, Google Meet and virtually every other major video chat service you can think of. (And if you don’t have a GoPro, you can also turn your phone camera into a webcam.)
Here’s how to do it.
What you’ll need to turn your GoPro into a webcam
You’ll need a GoPro Hero8 camera — the latest version of the popular sturdy camera, which came out in 2019. You can pick one up on Amazon for $300. You’ll also need a USB-C cord (there’s one that comes with the camera that will work) to plug the camera into your computer.
For the initial setup, you’ll need a microSD card and card reader to update your camera. If your computer doesn’t have a built-in USB port, you’ll need a dongle, too.
This trick only works for Mac users right now, though a Windows version is in development.
Finally, you’ll need something to mount your GoPro on to use it as a webcam. You’ve got a lot of options here that you can purchase from GoPro, like the JawsFlex Clamp ($49.99), the Magnetic Swivel Clip ($24.99) or the Suction Cup ($39.99).
It’s not required, but this handy Ulanzi G8-7 Battery Cove ($19.95 on Amazon) lets you access the camera’s USB port while covering the battery and SD card, so you don’t have to worry about anything falling out while you’re in webcam mode.
How to turn your GoPro into a webcam
Here are the step-by-step instructions on how to update your Hero8 camera into a webcam, according to GoPro.
Step 1: Update your camera
1. Download the GoPro Webcam Beta Firmware to your computer. (This download contains the update folder that will update your camera to support the webcam feature.)
2. Insert your camera’s microSD card into your computer using a microSD card adapter or USB reader.
3. Transfer the update file to your microSD card. To do this, open a new Finder window and select Downloads on the left to find the UPDATE.zip file. Double-click the UPDATE.zip file, which will create an UPDATE folder.
4. In the Devices section of the sidebar, look for your microSD card, which will be listed as Untitled. Drag the UPDATE folder to your microSD card.
5. Eject your microSD card by selecting the eject icon.
6. Update your camera: Make sure your camera is turned off. Insert your microSD card, and turn it on. The camera will automatically start updating,and will beep and turn itself off several times. When it’s done, you’ll see a check mark on the front screen. (If you get a message saying that the update failed, remove and reinsert the battery, and start the update again from the beginning.)
Step 2: Install the GoPro Webcam app, and connect your camera
1. Download GoPro Webcam Desktop Utility, and install the software on your computer. In the Status bar, you’ll see a GoPro icon.
2. Power on your camera, and connect it to your computer with the USB cable. In the Status bar, you’ll see the GoPro icon display a blue dot, which means you’ve successfully connected. You’ll also see the camera go into USB mode, with a red light and an image of a USB cable appearing on its screen.
Step 3: Preview your webcam
To get a preview of what your webcam setup will look like, click on the GoPro icon in the Status bar, and click Show Preview. This will help you make sure your shot looks good before you start webcamming. You can also switch between mirror mode and flip mode, depending on which you like better.
Step 4: Launch your GoPro Webcam
Open the video chat service you want to use. GoPro’s webcam software is compatible with Zoom, Google Meet, Microsoft Teams, Skype, Twitch, BlueJeans, GoTo Meeting, Snap Camera and Facebook Rooms. It’s also compatible with YouTube Live and Webex if you’re using a Google Chrome browser.
When you open your video chat service, select GoPro as your preferred camera. That may be an option when you first log in, or you might have to go to Settings to do so. For example, in Zoom, go to the Start Video icon at the bottom of the screen, click the up arrow, and select GoPro Camera. If you don’t see the GoPro camera option right away, you may need to exit and restart the video chat app.
Once the webcam is running, in the Status bar, the GoPro icon will show a red dot to indicate that it’s on.
Step 5: Perfect your webcam setup
Now that your webcam is up and running, you can make adjustments.
Resolution: To change the resolution, click on the GoPro icon in the Status bar, and select Preferences. You can change from 1080p (the default) to 720p if you want to.
Field of view: To adjust your field of view, you can change to different digital lenses. Click the GoPro icon in the Status bar, and select Digital Lens. Choose from wide, narrow or linear lenses.
There are lots of other ways to repurpose the equipment you already have, like your old phone and old laptop. Once you get your setup going, you can also check out the online classes and equipment you need to become a YouTuber, or just pick up the best gear for online meetings.
Credits to Alison DeNisco Rayome
Source: cnet


