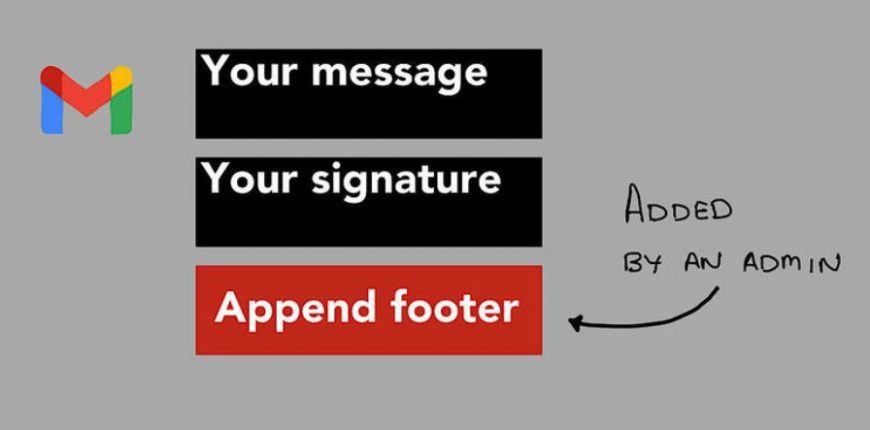
No need to plead for people to update your signature–instead, work with your Google Workspace admin to append a footer to every message.
An email signature can convey all sorts of information, such as a phone number, address, and website or social media links. For organizations that serve nearby customers such as restaurants, groceries, barber shops/salons, hardware stores, cultural sites, government offices, etc., an email signature might include the most essential piece of data: Current business hours. Of course, signatures sometimes include lots of legalese, with disclaimers that instruct anyone who is not the intended recipient to ignore the information and delete the email. In many places, the legal enforceability of these signature disclaimers is questionable, at best.
Too often, though, organizations ask each person to update email account signatures individually. For example, the marketing team for one organization I worked with would send out a key phrase, message, or link each month, along with a request for each person to take a few minutes to update their email signature. Compliance varied, as you might expect.
However, an administrator for an organization that uses Google Workspace may configure a footer to be applied to every Gmail sent from anyone in the organization. This eliminates the need to individually rely on people to modify signature settings. Of course, people may still use individual Gmail signatures. The system automatically appends the administrative footer to the end of emails.
How to configure the Google Workspace Append Footer setting
- Sign in to the Google Workspace Admin console at https://admin.google.com.
- Choose Apps | Google Workspace | Gmail | Advanced Settings. According to Google’s help pages, some people may need to choose Apps | Google Workspace | Gmail | Compliance.
- Scroll down to the Compliance section and place your cursor or tap over the “Append footer: Set up outbound footer text for legal compliance, informational, or promotional requirements” text. Select the Configure button that the system displays to the right.
- Enter a brief description of the footer contents.
- On the Add Setting screen, enter the information you want appended to all external messages. You may adjust both the background and/or foreground colors, font, and font size, in addition to a variety of text controls (e.g., bold, italics, alignment, links, and so on).
- Optional: Check the box in the Options section to also “Append the footer to messages being sent within your organization.” For example, this may be appropriate when you use the appended footer to emphasize messages that you want to reinforce both externally and internally.
- When finished, select Add Setting (or Save).
- At the bottom of the screen, select Save.
Once added and active, the footer will be appended to each email sent . The system indicates that it may take up to 24 hours to apply the setting. However, in most cases, unless you have a large number of accounts used in multiple places, you’ll likely notice appended footers display much sooner than that.
How to add, edit, or remove appended footers
The system lets you add more than one footer. Repeat the above process, selecting the Add Another button to create an additional footer.
Each additional footer appends to the message in sequence. Make sure to use distinctive and descriptive footer titles so that you may more easily identify the footer in the future.
You also may choose to Edit, Delete, or Disable each footer. Select Edit, then adjust the information and save it again. Delete the footer when you no longer need it. Choose Disable if you intend to use the footer again on a future date–this stops the footer from being applied, but keeps it available for use in the future.
Credit to Andy Wolber
Source: techrepublic